Learn how to bake a classic Cherry Cheesecake Recipe with simple steps. Discover key ingredients, tips, and variations for a smooth, velvety dessert at home!
Introduction
Cherry cheesecake is a timeless dessert that combines a creamy filling, sweet cherries, and a buttery crust. Because of its delicate yet rich taste, it has become a go-to treat for special occasions and everyday indulgence. However, creating the perfect cherry cheesecake recipe at home often feels challenging, especially if you are new to baking. Therefore, this guide aims to simplify the process by covering everything from key ingredients and equipment to detailed baking instructions and troubleshooting. In addition, you will learn helpful tips for achieving that silky texture, preventing cracks, and customizing your cheesecake with various flavors.
In this article, we will explore the fascinating background of cheesecake, discuss the importance of selecting quality ingredients, and provide a step-by-step recipe that includes both the crust and the cherry topping. We will also share useful variations and recommend ways to store and serve your masterpiece. By the end, you will feel confident in preparing a stunning cherry cheesecake recipe that looks and tastes amazing.
Table of Contents
Brief History and Origins of Cheesecake
Ancient Roots and Evolution
Although cherry cheesecake feels like a modern treat, the roots of cheesecake actually date back to ancient Greece. Early versions consisted of basic ingredients such as cheese, honey, and flour. These simple cakes were often served during festive events or to athletes in the original Olympic Games. Over time, as baking techniques evolved, so did cheesecake recipes.
However, it was in the United States that cream cheese–based cheesecakes truly took off. Several New York restaurants began experimenting with cream cheese in the early 1900s, paving the way for the iconic New York cheesecake that is still beloved today. Therefore, the U.S. can be credited for popularizing the ultra-creamy style many of us now enjoy.
A Turn to Fruit Toppings
In the mid-20th century, fruit-topped cheesecakes began appearing in diners and bakeries, mainly to add color and extra flavor to the dessert. Consequently, cherries became a top choice, as their sweet and slightly tart taste complemented the richness of the cream cheese. Today, cherry cheesecake stands out as both a family favorite and a go-to dessert for celebrations.
Related Reading: If you want to explore a unique twist on cheesecake, check out our Pecan Pie Cheesecake for another flavor combination.
Key Ingredients for Cherry Cheesecake Recipe
Cheesecake is made up of several essential ingredients that form a delicate balance of flavor and texture. Therefore, choosing quality ingredients and handling them correctly is vital.

Cream Cheese
- Type: Most bakers prefer full-fat cream cheese, because it delivers a velvety and stable texture.
- Why Room Temperature Matters: Softening cream cheese at room temperature makes it easier to blend without lumps.
- Possible Substitutions: In some cases, mascarpone or ricotta can be used, but these will alter the flavor and texture.
Sugar and Sweeteners
- Granulated Sugar: This is the most common sweetener for a cheesecake, ensuring consistent sweetness.
- Alternative Sweeteners: Honey or stevia can be used if you need to modify the sugar content, but these may affect the baking process.
Eggs and Thickening Agents
- Eggs: Eggs help bind the batter, giving the cheesecake its signature smoothness. However, over-whisking can introduce too much air and lead to cracks.
- Cornstarch or Flour: A small amount of cornstarch or flour can lend stability, especially if you have had trouble with cracks in the past.
Crust Ingredients
- Graham Crackers: Crushed graham crackers are the classic base. They provide a lightly sweet, crumbly foundation.
- Butter: Melted butter binds the crumbs, forming a cohesive crust.
- Other Options: You can swap out graham crackers for crushed cookies like Oreos or shortbread.
Cherry Topping
- Fresh vs. Canned Cherries: Fresh cherries offer a more natural taste, but canned cherries are convenient.
- Homemade Compote: Making a quick sauce on the stovetop can give you total control over sweetness and thickness.
- Balance of Flavors: Ensure your cherry topping has enough acidity (often from lemon juice) to complement the rich filling.
Essential Equipment and Tools
Having the proper tools on hand helps the entire process run smoothly. Therefore, gathering these items beforehand is beneficial:
- Springform Pan: Its removable sides facilitate easy slicing and presentation. An 8-inch or 9-inch size is common.
- Mixer: You can use a stand mixer or handheld electric mixer, but mix at a low speed to avoid over-aeration.
- Baking Sheets or Water Bath: A water bath (bain-marie) stabilizes temperature, reducing the chance of cracking. Alternatively, place a pan of water on the lower rack.
- Measuring Tools: A kitchen scale ensures accuracy, while cups and spoons help with standard measurements.
- Optional Items: Piping bags for whipped cream decoration, an offset spatula for smoothing the filling, and parchment paper to line the pan.
Step-by-Step Cherry Cheesecake Recipe
Below is an expanded recipe that guides you through every stage of making a cherry cheesecake recipe. Consequently, you will have all the details you need for an impressive final result.
Ingredients List
Crust
- 1½ cups graham cracker crumbs (about 10–12 full sheets)
- ¼ cup granulated sugar
- 5 tablespoons unsalted butter, melted
Filling
- 4 packages (8 ounces each) full-fat cream cheese, softened
- 1 cup granulated sugar
- 3 large eggs, at room temperature
- 1 teaspoon vanilla extract
- 1 tablespoon cornstarch (optional for added stability)
Cherry Topping
- 2 cups pitted cherries (fresh or canned)
- ⅓ cup sugar (adjust based on cherry sweetness)
- 1 tablespoon lemon juice
- 1 tablespoon cornstarch mixed with 1 tablespoon water (optional for thickening)
Preparing the Crust
- Combine Dry Ingredients
- First, crush your graham crackers into fine crumbs. You can use a food processor or place them in a sealable bag and crush them with a rolling pin.
- Next, stir in the sugar until well dispersed.
- Add Butter
- Slowly pour the melted butter over the graham mixture, mixing thoroughly so the crumbs become moist.
- Press Into Pan
- Grease your springform pan or line the bottom with parchment paper.
- Firmly press the crumb mixture into the bottom and slightly up the sides.
- Pre-bake at 350°F (175°C) for about 8 to 10 minutes. Therefore, the crust sets and will be less likely to crumble once you add the filling.
- Remove from the oven and let it cool for a few minutes.
Creating the Filling
- Beat the Cream Cheese
- In a large bowl, beat the softened cream cheese on low speed until it is smooth and lump-free. This step is crucial for a silky texture.
- Add Sugar Gradually
- Slowly add the sugar while continuing to mix. Because too much air can cause cracks later, keep the mixer speed low or medium-low.
- Incorporate Eggs
- Add the eggs one at a time, blending gently after each addition. Over-mixing can introduce air bubbles, so proceed with caution.
- If using cornstarch for added stability, sprinkle it in now.
- Finish With Vanilla
- Stir in the vanilla extract for a subtle, aromatic hint. Your filling should appear smooth and creamy.
Baking the Cheesecake
- Assemble the Water Bath (Optional)
- Wrap the base of your springform pan in aluminum foil to prevent leaks.
- Set the wrapped pan inside a large roasting pan. Then, carefully pour hot water into the roasting pan until it reaches about halfway up the sides of the springform pan.
- Bake Time
- Reduce the oven temperature to 325°F (160°C).
- Place the cheesecake in the oven and bake for approximately 50 to 60 minutes. You will notice the edges become slightly firm while the center retains a gentle jiggle.
- Cool Gradually
- Turn off the oven and prop the door open slightly. Leave the cheesecake inside for around 1 hour so it cools slowly. Therefore, you reduce the likelihood of cracks.
- Chill Thoroughly
- After removing the cheesecake from the oven, place it on a cooling rack.
- Once it reaches room temperature, transfer it to the fridge. Chill for at least 4 hours or overnight.
Making the Cherry Topping
- Combine Ingredients
- In a small saucepan, place cherries, sugar, and lemon juice.
- Heat over medium-low, stirring occasionally.
- Adjust Thickness
- If you prefer a thicker sauce, add the cornstarch slurry (1 tablespoon cornstarch mixed with 1 tablespoon water).
- Continue cooking until the mixture simmers, allowing it to thicken.
- Cool and Serve
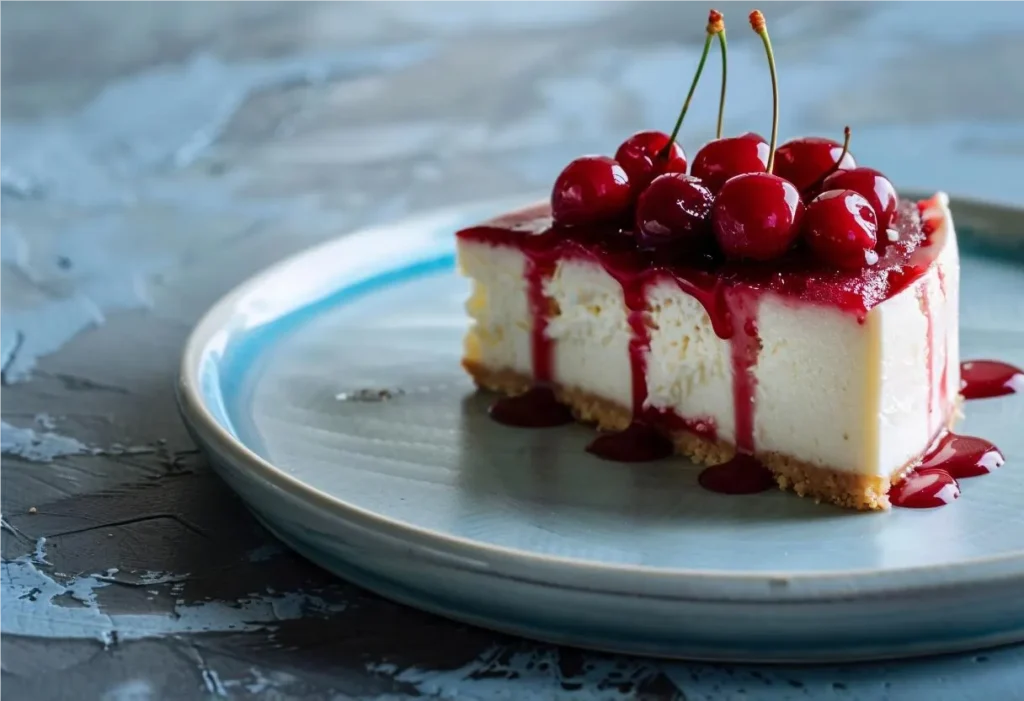
- Let the topping reach room temperature before spooning it over your cooled cheesecake.
- You can top the entire cheesecake or slice it first and spoon cherry sauce onto individual servings.
Nutritional Information (per 100g)
Below is an approximate nutritional breakdown for cherry cheesecake recipe (crust, filling, and standard cherry topping):
| Nutrient | Amount (per 100g) |
|---|---|
| Calories | ~280 kcal |
| Total Fat | ~18 g |
| Saturated Fat | ~10 g |
| Carbohydrates | ~24 g |
| Sugars | ~17 g |
| Protein | ~4 g |
| Sodium | ~180 mg |
| Cholesterol | ~70 mg |
Note: Actual values depend on factors such as ingredient brands, exact portion sizes, and any additional toppings.
Cherry Cheesecake Variations
Cheesecake is versatile, so you can modify it to match your personal preferences.
No-Bake Cherry Cheesecake
If you want to avoid using the oven, you can prepare a no-bake version:
- Gelatin or Whipped Cream Base
- Instead of eggs, you use whipped cream or gelatin to set the cheesecake.
- Refrigeration
- This variant relies on chilling, making it perfect for hot days or busy schedules.
Chocolate-Cherry Cheesecake
- Chocolate Infusion
- Add cocoa powder or melted chocolate to your filling.
- Topping Twist
- Pair chocolate filling with the cherry topping for a deeper flavor profile.
Mini Cherry Cheesecakes
- Muffin Pan
- Line a muffin tray with paper liners, pressing a smaller crust portion into each cup.
- Portion Control
- Perfect for parties and faster baking times.
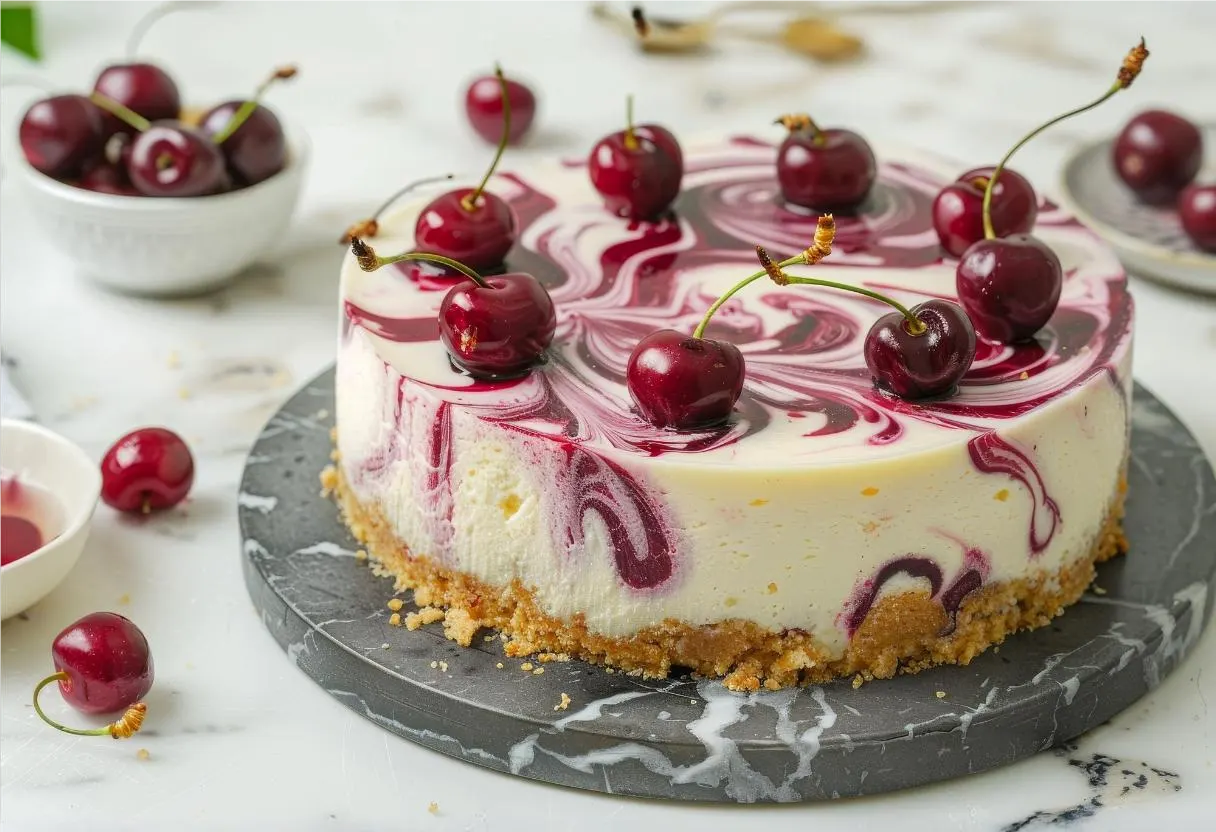
Cherry Swirl Cheesecake
- Swirl in Sauce
- Reserve some cherry sauce, swirling it directly into the unbaked filling.
- Visual Appeal
- Creates a marbled effect that looks stunning once sliced.
Tips, Tricks, and Troubleshooting
Preventing Cracks
- Room-Temperature Ingredients
- Cold cream cheese or eggs increase the risk of lumps and cracks.
- Low Mixing Speed
- Minimizes air bubbles, preventing structural weakness in the batter.
- Water Bath
- The gentle heat distribution helps the cheesecake bake evenly.
- Slow Cooling
- Dramatic temperature shifts often cause cracks, so let it cool gradually.
Achieving Perfect Texture
- Full-Fat Ingredients
- They produce a creamy, rich taste that is difficult to replicate with low-fat items.
- Adequate Chill Time
- Leaving your cheesecake overnight in the fridge helps flavors blend and the texture firm up.
- Balanced Sweetness
- Adjust sugar in both the filling and topping if your cherries are especially sweet or tart.
Fixing Mishaps
- Runny Filling
- Add a bit of cornstarch or flour if the batter seems too thin before baking.
- Thin Topping
- Use a cornstarch slurry or simmer longer to thicken.
- Small Cracks
- Cover them with cherry topping, whipped cream, or chocolate drizzle.
Serving Suggestions and Presentation

Plating Techniques
In order to serve cheesecake slices neatly, heat a sharp knife under hot water, wipe it dry, and then make your cut. Repeat this step between slices to maintain clean edges.
Garnishes
- Whipped Cream: A small rosette or swirl can add an elegant touch.
- Extra Cherries: Scatter fresh cherries around the top for a splash of color.
- Chocolate Shavings: Provide a pleasing visual contrast and a subtle crunch.
Beverage Pairings
- Coffee or Tea: The bitterness in coffee or tea balances the richness of the cheesecake.
- Iced Milk: A comforting choice, especially for kids or those who love creamy drinks.
Seasonal Themes
- Festive Occasions: Dress your cheesecake with red-and-white garnishes for holidays like Valentine’s Day.
- Patriotic Decor: Combine cherries with blueberries for a red, white, and blue theme on the Fourth of July.
Storage, Freezing, and Make-Ahead Tips
Refrigeration
Store leftover cheesecake in an airtight container or cover it with plastic wrap. It remains fresh for 3–5 days. However, if you want to preserve the crispness of the crust, store any cherry topping separately and add it just before serving.
Freezing
Wrap the cheesecake (minus the cherry topping) in plastic wrap and then foil before placing it in the freezer. It can last up to 2 months. When you are ready to serve, thaw it in the refrigerator overnight. Once thawed, you can top it with cherries.
Make-Ahead Strategies
If you plan to serve cheesecake at a party:
- Bake the Cheesecake
- Prepare and bake it up to a day in advance, then refrigerate.
- Add Topping Later
- Spoon the cherry topping shortly before serving. This step helps maintain the best texture.
Transporting
If you are taking your cheesecake to another location, keep it chilled. You can place it in a cooler with ice packs, ensuring it stays firm until serving time.
Frequently Asked Questions (FAQ)
What is the difference between New York cheesecake and classic cheesecake?
New York cheesecake is typically denser and richer because it often includes more cream cheese and sometimes additional egg yolks. Classic cheesecake, on the other hand, usually has a lighter texture. Also, New York cheesecake sometimes uses a touch of sour cream for extra tang, whereas a classic version might rely solely on cream cheese and milk.
Is sour cream or heavy cream better for cheesecake?
Both can yield delicious results; however, sour cream imparts a tangy bite and lighter texture, while heavy cream contributes richness and creaminess. Which you choose depends on your taste preferences. Sour cream can make the cheesecake slightly softer, whereas heavy cream helps keep the cheesecake firm.
Is it better to bake or not bake a cheesecake?
Baked cheesecakes, such as this cherry cheesecake recipe, usually offer a dense, creamy consistency that many people love. No-bake cheesecakes, on the other hand, rely on whipped cream or gelatin to set. They can be lighter and easier to make, but some find them less rich than baked versions.
What are the three types of cheesecake?
The three main types include classic (or “traditional”) cheesecake, New York–style cheesecake, and no-bake cheesecake. However, there are also regional variations such as Chicago-style or basque cheesecake, each with unique characteristics.
Conclusion
Cherry cheesecake remains a crowd-pleasing dessert with its smooth filling, contrasting cherry topping, and buttery crust. Therefore, if you follow the steps carefully, use room-temperature ingredients, and give your cheesecake plenty of time to chill, you can achieve professional-level results at home. Also, keep in mind that a water bath and slow cooling process minimize cracks, making the surface flawless.
However, do not be afraid to experiment with other crusts or toppings to match your preferences. Swirling chocolate or caramel, adding fresh fruit, or sprinkling nuts can turn one cheesecake into countless unique versions. Above all, remember that practice is part of the process. Each time you bake a cheesecake, you will refine your technique and expand your flavor repertoire. We hope you enjoy sharing this homemade cherry cheesecake with friends and family as much as you enjoy baking it.

